Why not share this article with your friends? 😉
An important aspect that is often overlooked when it comes to WordPress is a site icon, commonly referred to as a favicon.
It is a tiny graphic that appears in bookmarks, browser tabs and other user interfaces to represent your website.
While it may seem insignificant, a well-designed site icon can help your customers remember your brand and increase brand recognition.
A site icon is a small, square image that represents your website across different platforms and user interfaces.
It is displayed prominently in web browser tabs, bookmarks and history lists, making it easier for visitors to identify and find your site in a sea of open tabs.
When visitors bookmark your site, the site icon adds visual appeal and helps your site stand out in their collection.
Beyond its practical purpose, a site icon serves as a branding element. It provides a visual representation of your website or business and contributes to the overall user experience.
A well-designed site icon can convey a sense of professionalism and credibility, leaving a lasting impression on visitors and increasing their trust in your brand.
In the following sections, we will explore how to choose the right site icon for your WordPress website, ensuring that it aligns with your brand identity and effectively represents your online presence.
When it comes to choosing a site icon for your WordPress website, there are several considerations to keep in mind.
To maximise the impact of your site icon, it’s important to consider factors such as visual distinctiveness, scalability and relevance to your site’s identity.
A memorable and easily recognisable site icon can make a significant contribution to the overall visual appeal of your website and help reinforce your brand image.
Your site icon should be visually distinct and easily recognisable.
It should stand out among other tabs or bookmarks, making it easier for users to identify your site at a glance.
Avoid complex designs or intricate details that may be difficult to see in a small icon format.
Because site icons are displayed at different sizes on different devices and platforms, it’s important to choose an icon that scales effectively.
Ensure that your site icon remains clear and recognisable when displayed at smaller sizes, such as in browser tabs or on mobile devices.
Your site icon should match your brand identity and evoke the right emotions or associations.
Consider incorporating elements, colours or symbols that are representative of your site or business.
A site icon that accurately reflects your brand can help build brand recognition and strengthen your overall identity.
Aim for a clean and simple design for your website icon.
Avoid clutter or excessive detail that may become unrecognisable when scaled down.
A clear and straightforward icon will have a greater impact and be more memorable to users.
If you already have an established brand logo or visual identity, it’s a good idea to maintain consistency between your website icon and other branding elements.
This will help create a cohesive and unified experience for your visitors.
You don’t have to be a professional designer to create an attractive site icon. There are many online tools and resources available to help you design or customise your site icon for free, such as Canva or Vista Create.
Before you can change your site icon in WordPress, it’s important to ensure that you have a properly prepared image that meets the recommended requirements.
WordPress recommends using a square image with dimensions of at least 512×512 pixels for your site icon.
This allows for better compatibility across devices and platforms.
You can save your site icon in a common image format such as PNG or JPEG.
When resizing or creating your website icon, make sure the image quality remains sharp and clear.
Pay attention to detail, especially if your website icon contains text or intricate designs.
Blurry or pixelated icons can detract from the overall impact and professionalism of your website.
To ensure your site icon displays correctly on different devices and screen resolutions, test its responsiveness.
Check how it displays on desktop browsers, mobile devices, and various popular web browsers to ensure optimal visibility and clarity.
By following these preparation steps, you’ll have a properly sized and formatted site icon ready to implement in WordPress.
Changing your site icon in WordPress is a simple process. Follow these step-by-step instructions to update your site icon.
Login to your WordPress website and navigate to the admin dashboard.
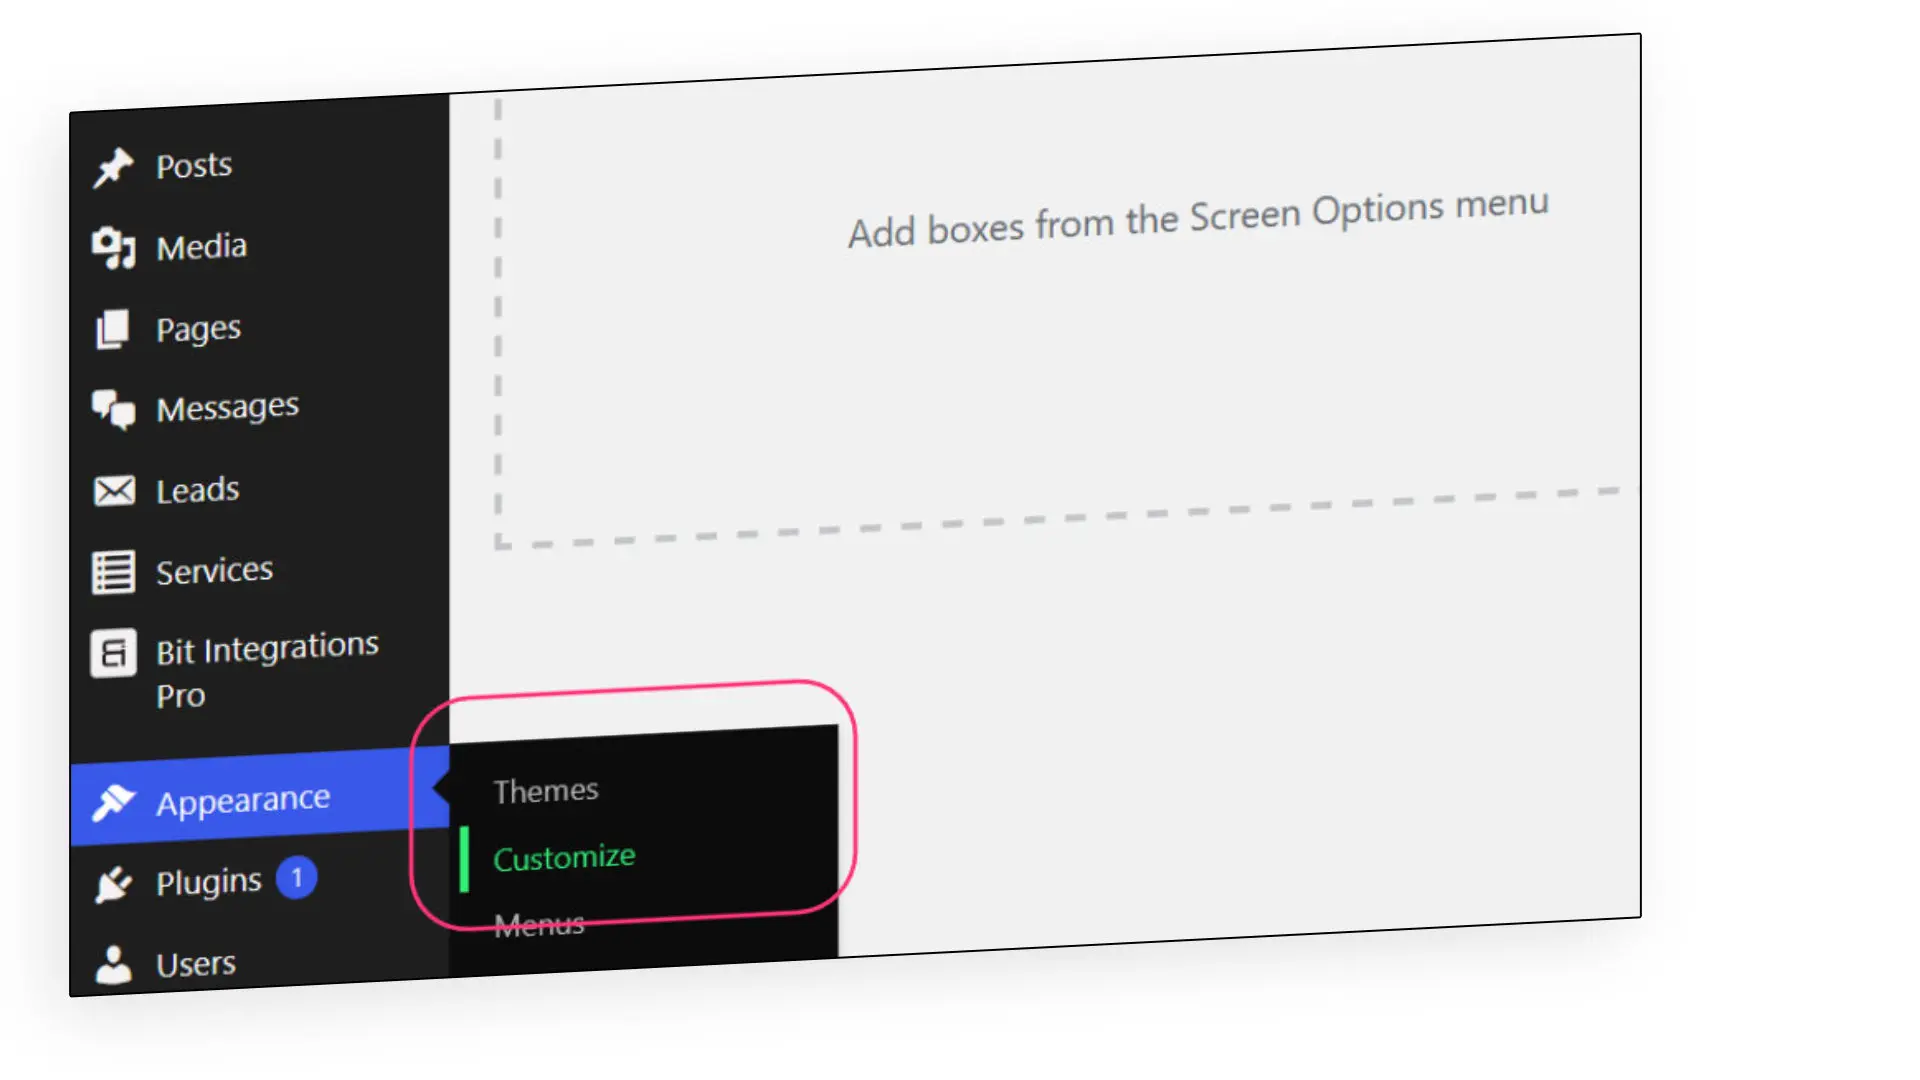
From the dashboard, locate and click on ‘Appearance’ in the left-hand menu. Then select ‘Customise’ from the dropdown options. This will open the WordPress Customizer.
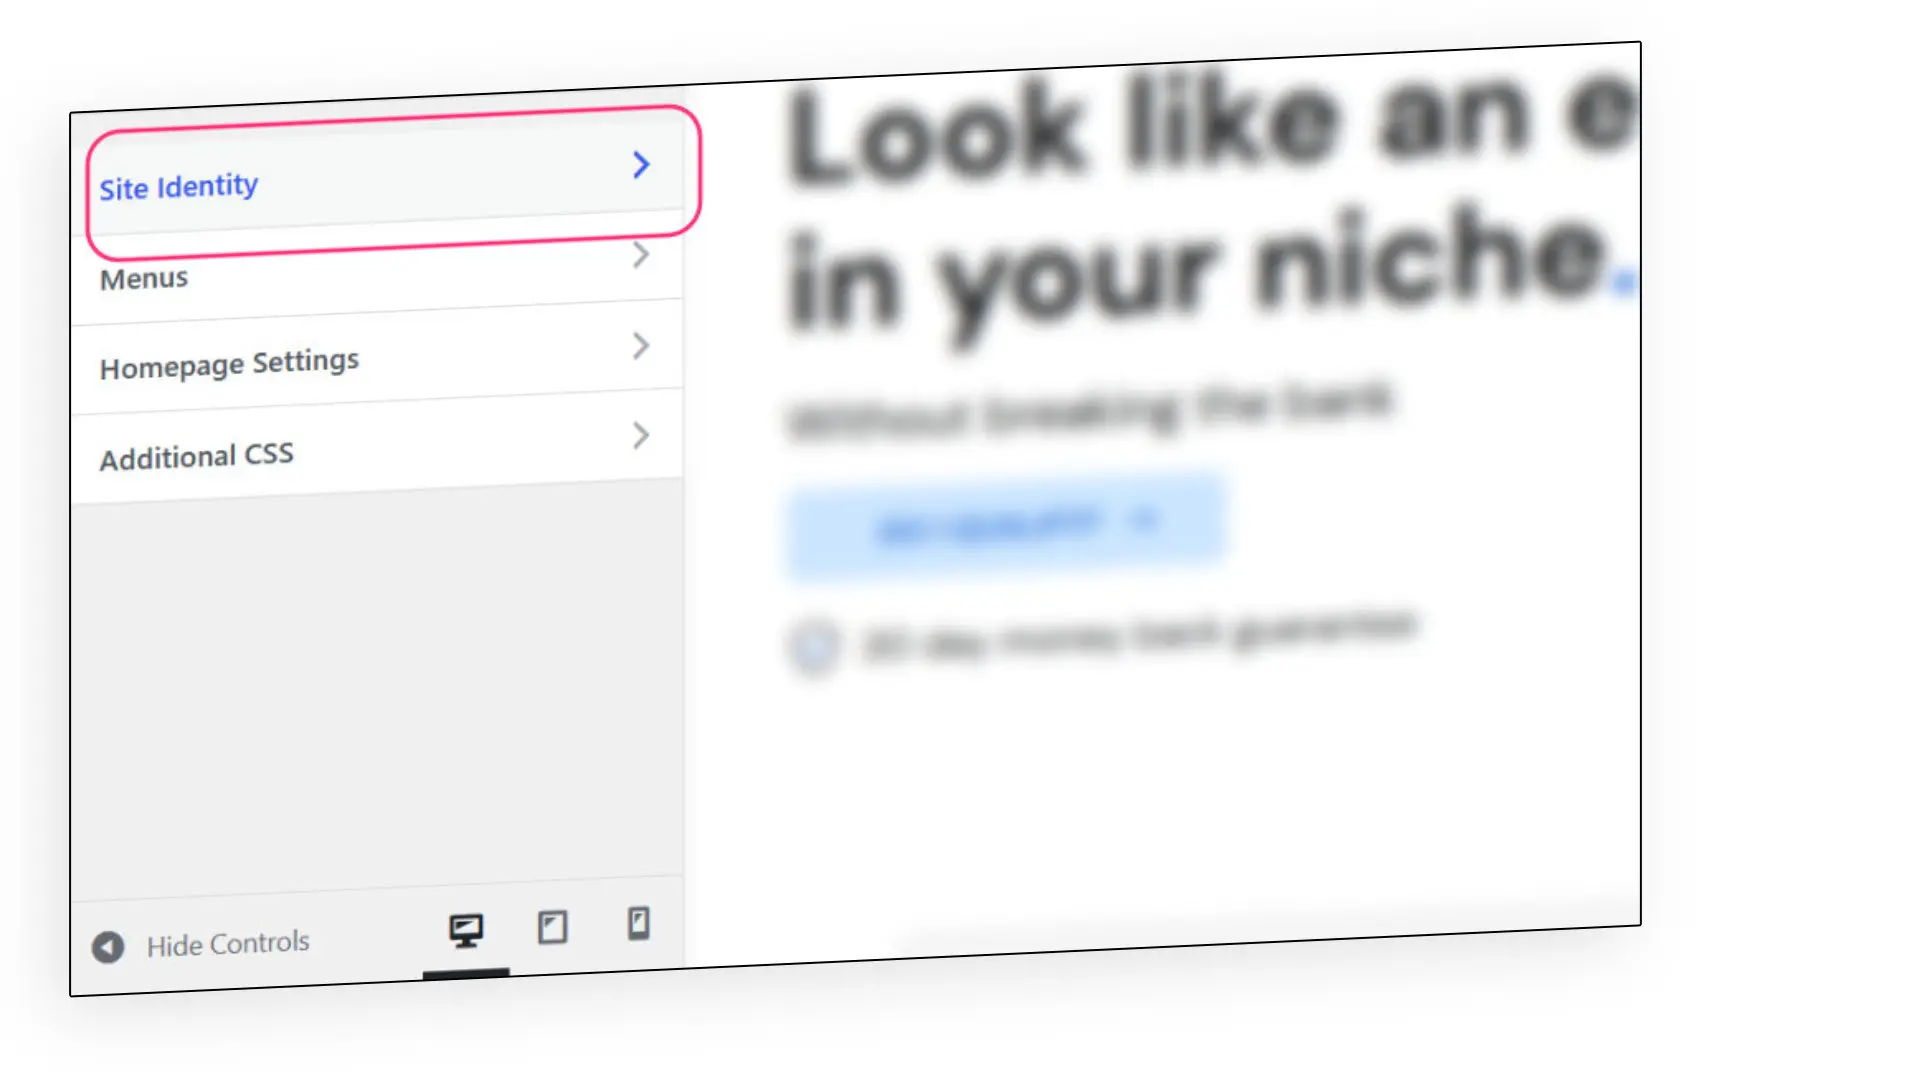
Within the Customizer, locate the Site Identity tab. Click on it to access the Site Identity settings.
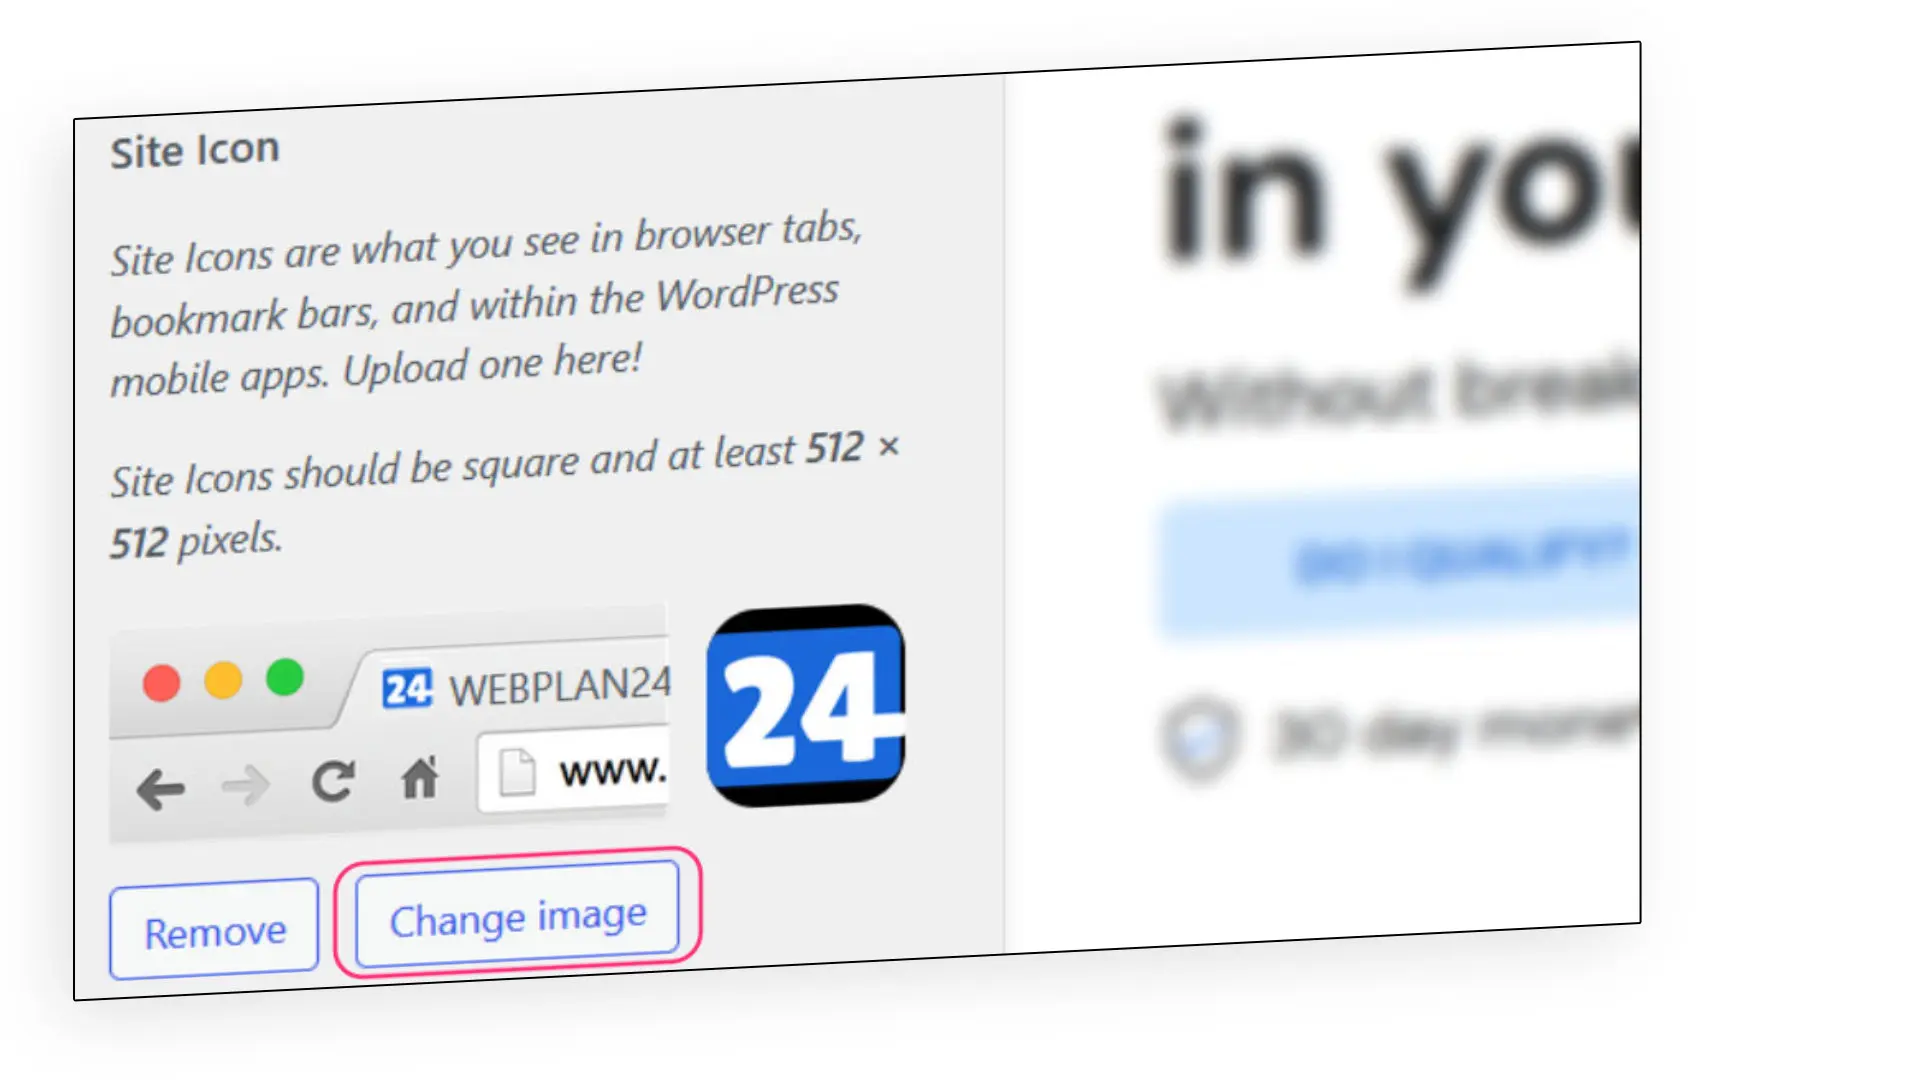
Within the Site Identity settings, you will find an option to upload your site icon. Click on the ‘Select Image’ or ‘Change Image’ button to select the image file from your computer.
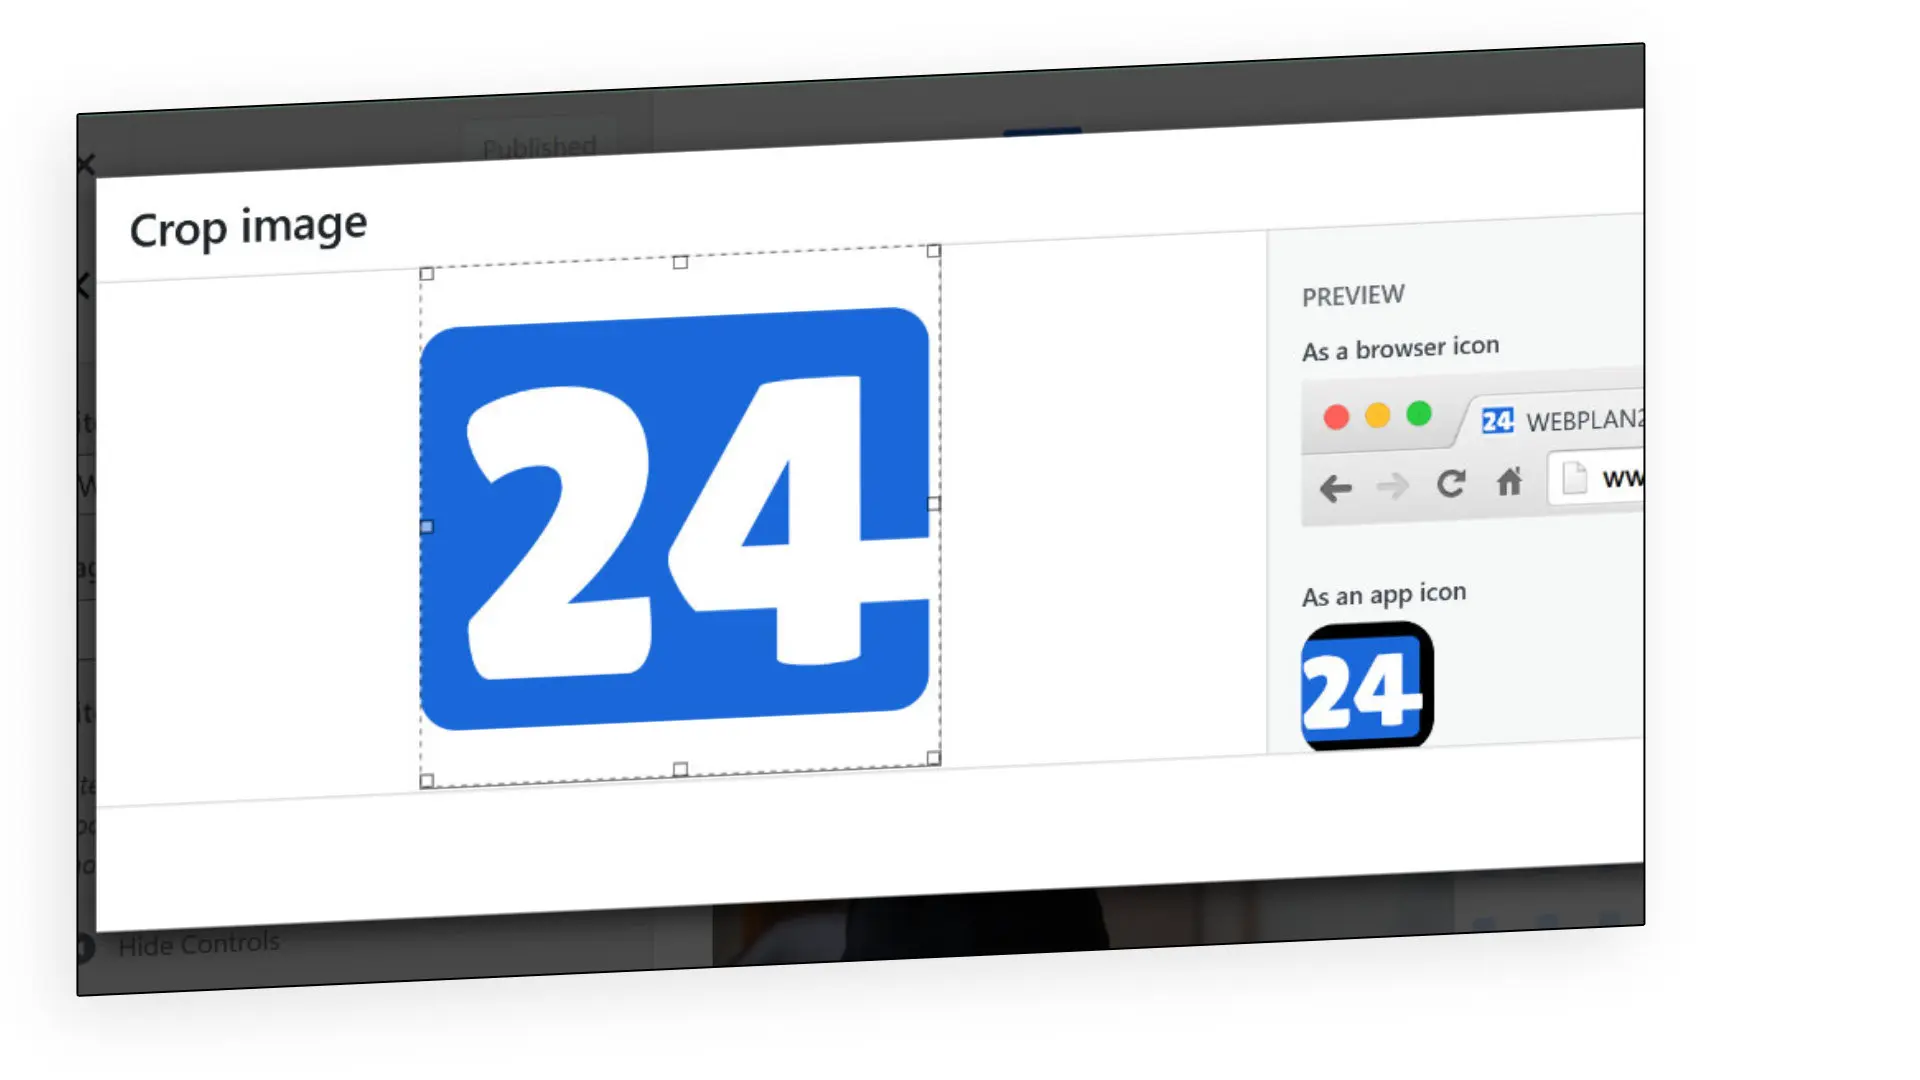
Depending on the dimensions of your site icon and the default cropping size in your WordPress theme, you may be prompted to crop and adjust the image. Use the cropping tool to frame the icon as desired and make any necessary adjustments.
Once you’re happy with your changes, click the ‘Save & Publish’ button in the top right corner of the Customizer screen to apply the new site icon to your WordPress website.
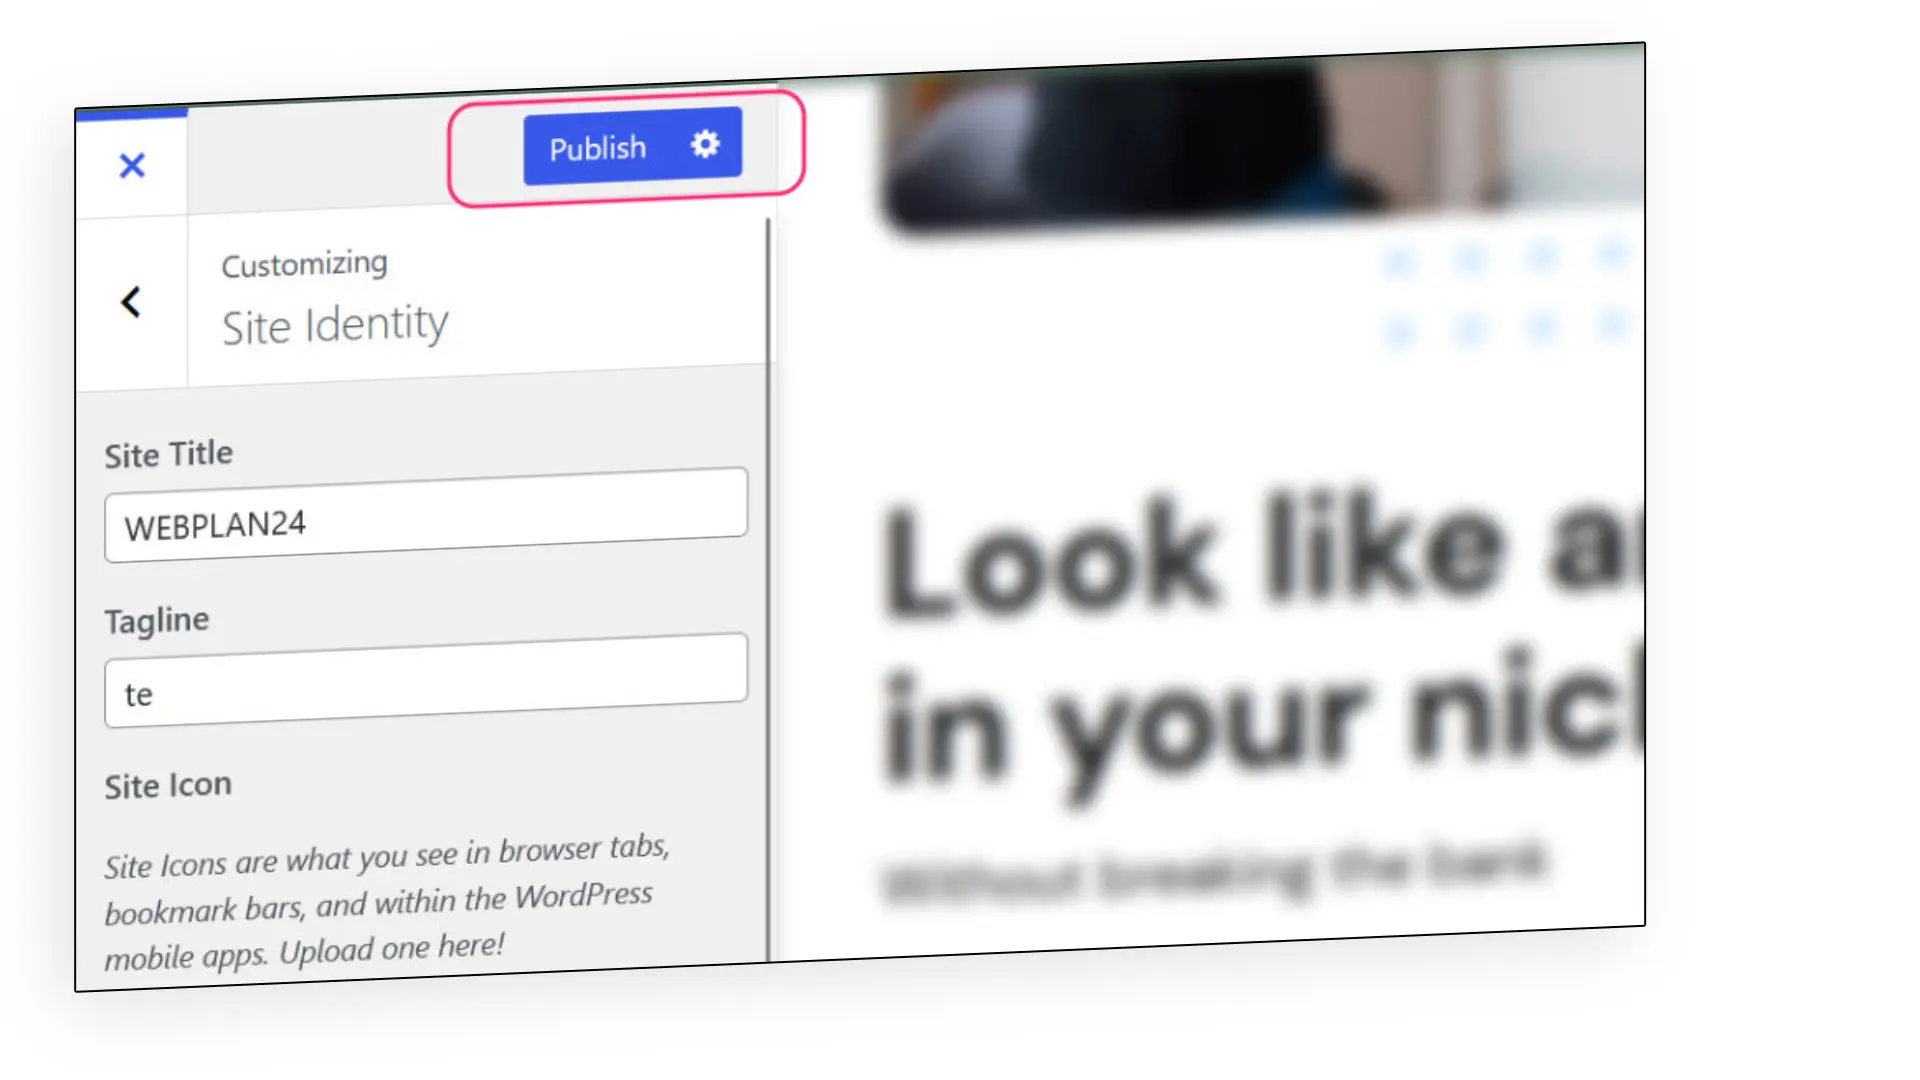
After saving the changes, visit your website in a new browser tab to verify that the site icon is displayed correctly. If necessary, clear your browser cache to make sure you’re seeing the updated version of your site.
It may take a few moments for the updated icon to propagate across all devices and platforms, so please be patient.
While changing the site icon in WordPress is generally a smooth process, you may encounter some common issues along the way. Here are some troubleshooting tips to help you resolve them.
If you’ve changed your site icon and it doesn’t update on your site, try clearing your browser cache.
Also, make sure you have saved and published the changes in the WordPress Customizer.
If the issue persists, try temporarily disabling any caching plugins or CDN services.
If your site icon appears blurry or distorted, this may be due to the image resolution or resizing process.
Make sure you’re using an image of sufficient quality and that it meets the recommended dimensions of at least 512×512 pixels.
Consider using image editing software or online tools to accurately resize the image.
Rarely, certain WordPress themes or plugins may conflict with the site icon feature, causing display issues.
In such cases, try switching to a default WordPress theme temporarily to see if the site icon displays correctly. If it does, consider contacting the theme or plugin developer for assistance in resolving the compatibility issue.
Different web browsers may interpret and display site icons differently.
If you notice inconsistencies in how your site icon appears in different browsers, check that the image file is properly formatted and meets the recommended specifications.
You can also try re-uploading the site icon in the WordPress Customizer to refresh the icon’s display.
In today’s digital landscape, every detail matters when it comes to creating an engaging and memorable website.
Often overlooked, the site icon plays a significant role in increasing your brand recognition and leaving a lasting impression on your visitors.
Take the time to choose a site icon that accurately represents your site or business.
Pay attention to its appearance across different devices, browsers and platforms to ensure it remains consistent and recognisable.
By implementing a well-designed site icon, you can enhance your site’s branding and make it stand out from the crowd.


30 day money back guarantee